---
title: "Teams and Roles"
canonical: https://trickest.com/docs/using-the-app/users-access-management/teams-and-roles
description: "Assign roles to users, create teams, and manage permissions across your Vault."
---
# Teams and Roles
Role-based access control (RBAC) is available exclusively for [Enterprise](https://trickest.com/pricing/) users. [Contact the account team](/demo) if you need access.
For an explanation of what each role allows, see [Roles & Permissions](/docs/key-concepts/roles-and-permissions).
## Assigning Roles to Users
Go to **Settings > Vault > Members** and click on a user to open their details drawer.
- **Vault Role**: select the user's global role from the dropdown.
- **Space access**: manage which workspaces the user can access and with what role. Click **Add access** to select a workspace and assign a workspace role to it. You can add access for multiple workspaces. To change a role on an existing workspace, update it inline. To remove access to a workspace, delete the entry.
---
## Managing Teams
Go to **Settings > Vault > Teams** to create and manage teams.
### Creating a Team
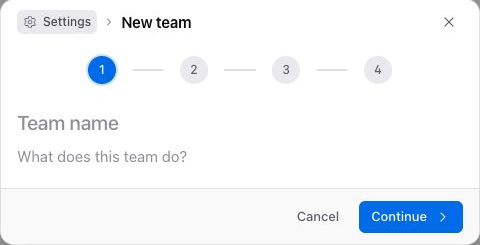
Click **Create team** in the top-right of the Teams page to open the **New team** dialog. Team creation is a four-step wizard with a stepper at the top of the dialog.
Enter a **Team name** and an optional **Description**. Click **Continue**.
Search for and select users to add to the team. The list shows how many users are available and how many are currently selected. You can add more members later. Click **Continue**.
Set the team's default workspace access. For each workspace you want the team to have, pick the workspace and a workspace role. You can add multiple assignments, or skip this step and grant access later. Click **Continue**.
The review step summarizes the **Team Name**, **Description**, **Members** count, and **Space access** assignments. Click **Create team** to create the team. Use **Back** at any earlier step to revise.
 ### Editing and Deleting a Team
Click a team in the list to open its details panel. In the panel header, open the **`...`** menu to:
- **Edit team** to rename the team or update its description.
- **Delete team** to delete it entirely. Deletion requires confirmation. Members keep their spaces; review individual access if your goal is to remove someone's permissions.
### Managing Members
The team's details panel has a **Members** section. Click **Add users** in that section to add members; a user can be a member of multiple teams simultaneously. To remove a member, hover the entry in the list and use the remove action that appears.
## Assigning Workspace Access to Teams
In the team's details panel, the **Space access** section lists the workspaces the team can access and the role granted on each. Use **Add space access**, choose the space and role, then confirm with **Add space access**. You can update an existing role inline or remove access entirely from the same row. All team members inherit the resulting permissions in addition to any directly assigned roles.
---
_Markdown source of https://trickest.com/docs/using-the-app/users-access-management/teams-and-roles._
### Editing and Deleting a Team
Click a team in the list to open its details panel. In the panel header, open the **`...`** menu to:
- **Edit team** to rename the team or update its description.
- **Delete team** to delete it entirely. Deletion requires confirmation. Members keep their spaces; review individual access if your goal is to remove someone's permissions.
### Managing Members
The team's details panel has a **Members** section. Click **Add users** in that section to add members; a user can be a member of multiple teams simultaneously. To remove a member, hover the entry in the list and use the remove action that appears.
## Assigning Workspace Access to Teams
In the team's details panel, the **Space access** section lists the workspaces the team can access and the role granted on each. Use **Add space access**, choose the space and role, then confirm with **Add space access**. You can update an existing role inline or remove access entirely from the same row. All team members inherit the resulting permissions in addition to any directly assigned roles.
---
_Markdown source of https://trickest.com/docs/using-the-app/users-access-management/teams-and-roles._