---
title: "Inviting Users"
canonical: https://trickest.com/docs/using-the-app/users-access-management/inviting-users
description: "Invite new users to your Vault, manage pending invitations, and view active users."
---
# Inviting Users
Only users with the [Super Admin](../../key-concepts/roles-and-permissions) role can invite and manage users.
## Inviting Users
Go to **Settings > Vault > Members**.
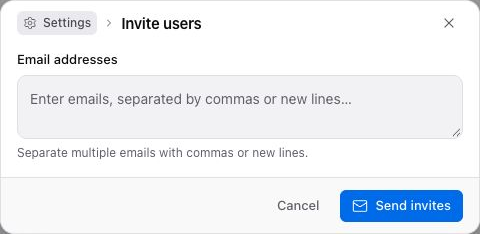
Click **Invite members** in the top-right corner of the page. The **Invite users** dialog opens.
Paste one or more email addresses into the **Email addresses** field. The field accepts multiple addresses at once, separated by commas or new lines.
Click **Send invites**. Each address receives an invitation email with a link to register.
Invitations can only be sent if your Vault has not reached its user limit. If the limit is reached, revoke unused pending invitations, deactivate a member who no longer needs access, or ask your account owner about adjusting the plan. Review the impact before removing anyone's access.
 ## Invitations
Use the **All members**, **Active**, **Inactive**, and **Invitations** filters to find the entries you need. Pending invitations can offer **Resend**, **Copy link**, and **Revoke**. Expired invitations offer **Revoke**.
To cancel an invitation before it is accepted, open the row's **`...`** menu and select **Revoke**. A confirmation dialog (**Revoke invitations?**) appears; click **Revoke** to confirm.
## Active Users
Once a user registers using their invitation link, they appear in the **Active members** section. Seat usage includes active members and pending invitations. Check the displayed usage before inviting another person. For each active user, the teams they are a member of are shown alongside their account details.
From this page you can also assign or change the global and workspace roles for any active user. See [Teams and Roles](./teams-and-roles) for details on available roles and what each one grants.
---
_Markdown source of https://trickest.com/docs/using-the-app/users-access-management/inviting-users._
## Invitations
Use the **All members**, **Active**, **Inactive**, and **Invitations** filters to find the entries you need. Pending invitations can offer **Resend**, **Copy link**, and **Revoke**. Expired invitations offer **Revoke**.
To cancel an invitation before it is accepted, open the row's **`...`** menu and select **Revoke**. A confirmation dialog (**Revoke invitations?**) appears; click **Revoke** to confirm.
## Active Users
Once a user registers using their invitation link, they appear in the **Active members** section. Seat usage includes active members and pending invitations. Check the displayed usage before inviting another person. For each active user, the teams they are a member of are shown alongside their account details.
From this page you can also assign or change the global and workspace roles for any active user. See [Teams and Roles](./teams-and-roles) for details on available roles and what each one grants.
---
_Markdown source of https://trickest.com/docs/using-the-app/users-access-management/inviting-users._