Building a Workflow
- Open Workflow page of desired workflow (which you have created before),
- Use Open Workflow button to open Workflow Builder and start building.
1. Adding Nodes
To add a Library node (Tool, Script, or Splitter), in Left Sidebar's Library tab, select the node you want to add and drag it into the Canvas.
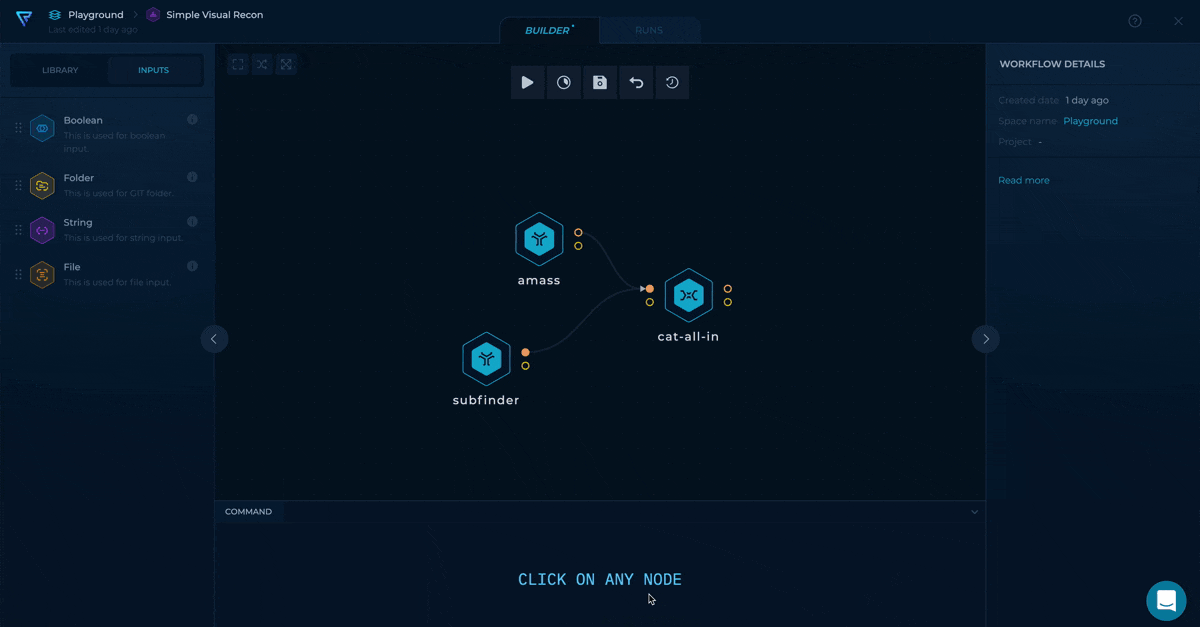
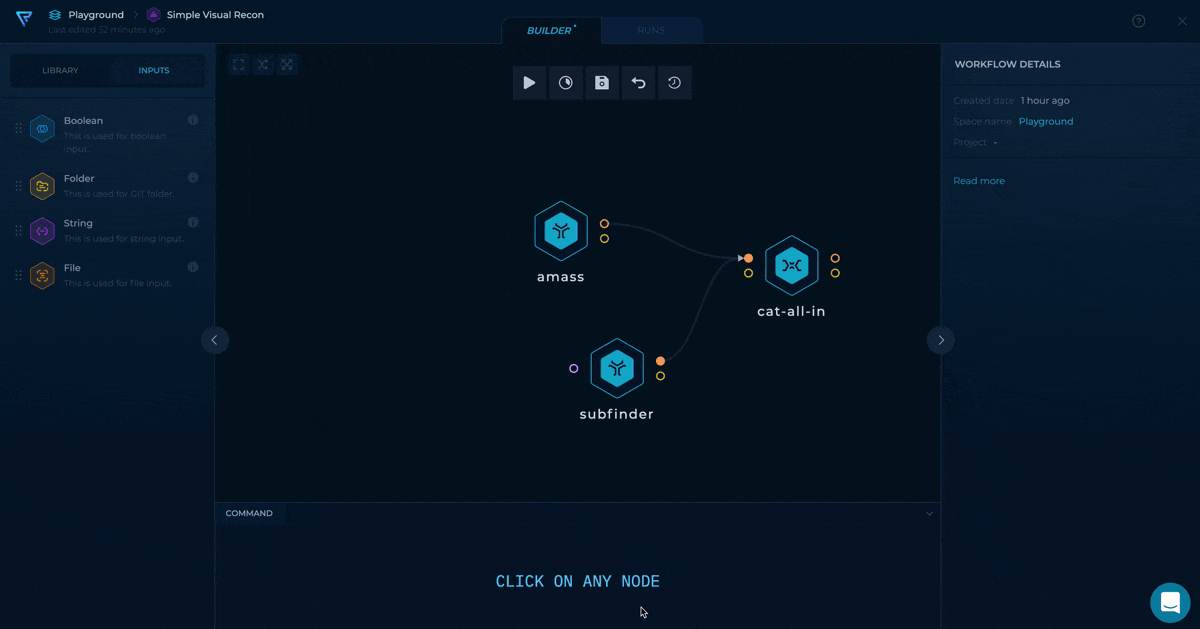
Let's see how to add both amass tool and cat-all-in script as a workflow nodes:
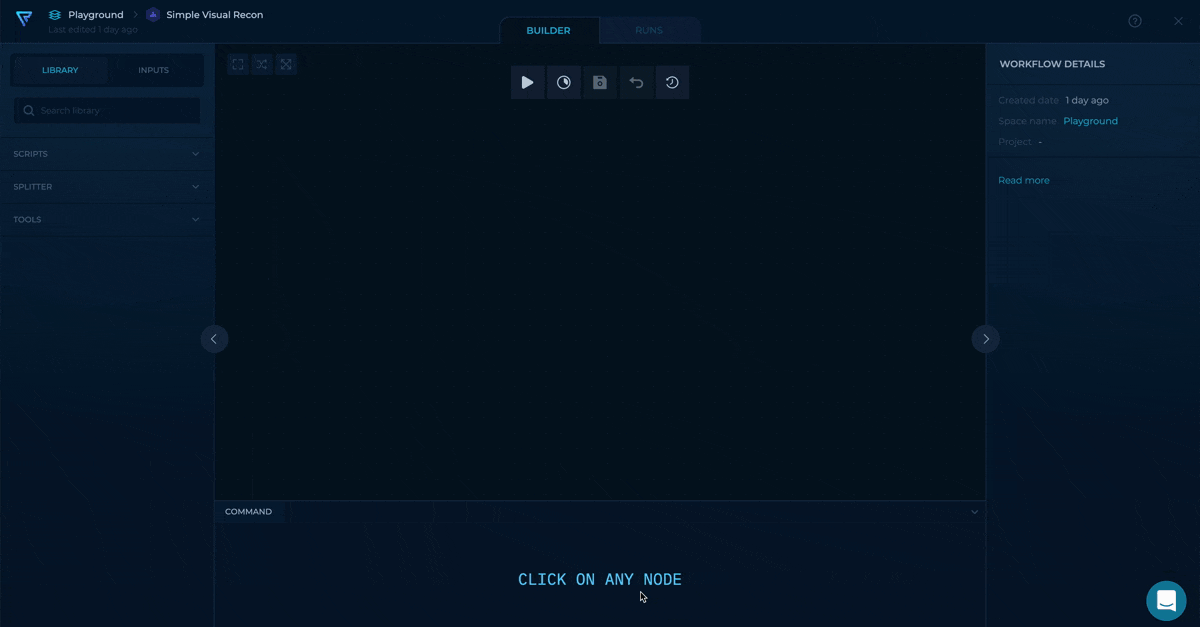
Adding amass tool and cat-all-in script in workflow
2. Connecting Nodes
Library nodes (Tools, Scripts, and Splitters) are connected with each other via data dependencies defined between their inputs and outputs. Data is passed from one node's output to another node's input. Both node inputs and outputs are represented by small circles (called "ports") on the perimeter of the node. Left sided ports represent inputs, right sided ports represent outputs.
Tool Ports Visibility
By default, tool output ports are exposed and visible on canvas, while input ports are partially visible:
Required inputs: Each tool has a set of required inputs to be set for successful
execution. By default, required input ports are visible on canvas and
ready to be utilized.
Additional inputs: Beside required inputs, each tool has a set of additional inputs
to be set optionally. By default, additional input ports are not
visible on canvas. To utilize any of those inputs, you need to
expose its port in following way:
- Single-click on Tool node to open Object Inspector in Right Sidebar,
- Find desired input in Disconnected section,
- Switch its toggle to ON to expose / visualize it in Canvas.
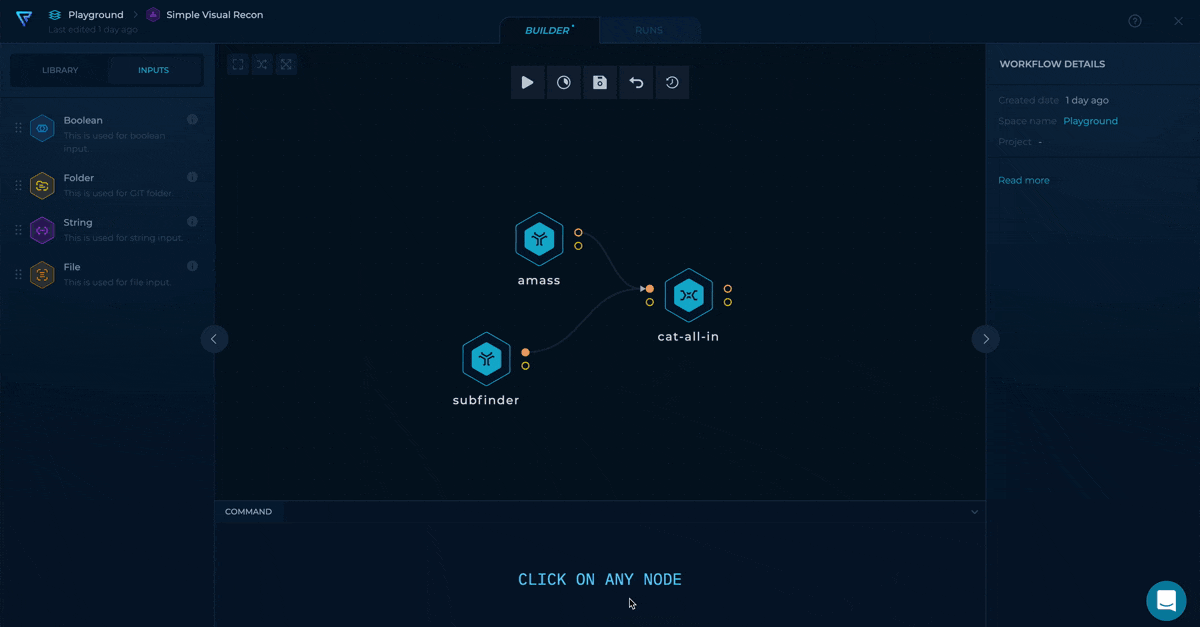
To connect 2 Library nodes, hover over the output port on the first node and drag it to the desired input port of another node.
Let's see how to connect the previously added amass tool and cat-all-in script. We are also adding subfinder. As both amass and subfinder produce files as an output, we can connect them to the cat-all-in script file input.
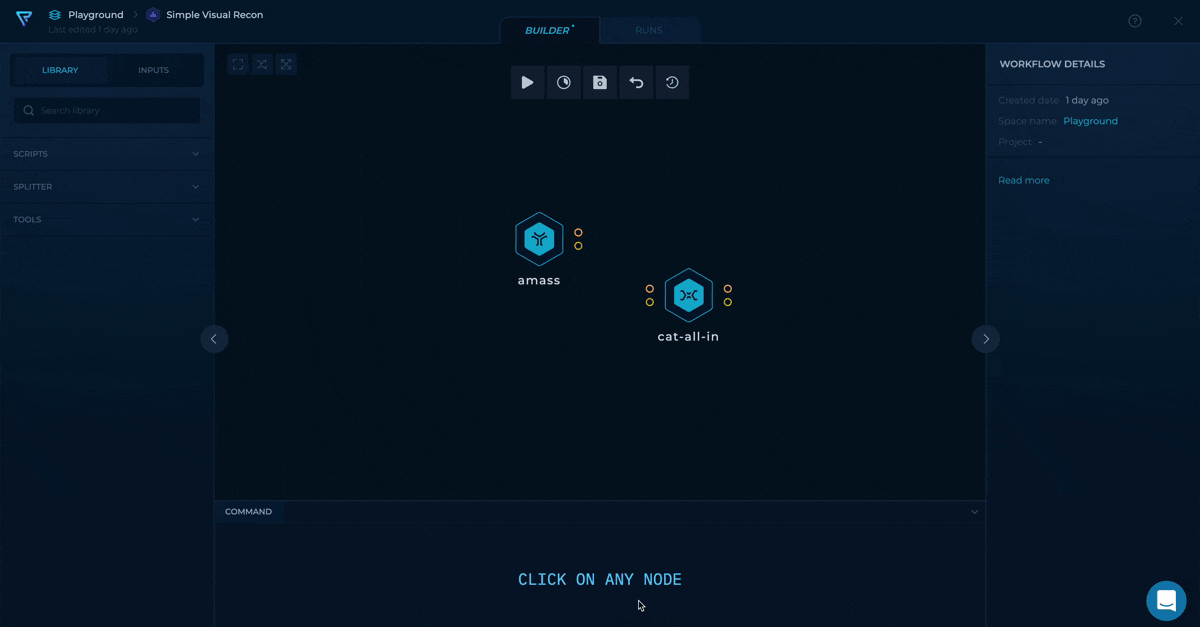
Connecting amass and subfinder tools with cat-all-in script in workflow
3. Setting Inputs
Input Nodes
Inputs (parameters) for Tool/Script are defined using Input Nodes - by adding Input Node, connecting Input Node to desired Tool/Script input port, and populating Input Node's value.1. Single-click on the Tool/Script in the Canvas.
2. In the Object Inspector (Right Sidebar) all possible inputs are listed, divided into 2 sections - Connected inputs and Disconnected inputs:
| Section | Description |
|---|---|
| DISCONNECTED | In this section, all inputs available to be set are listed.
|
| CONNECTED | In this section, all populated inputs are listed. For each input, its value is shown within a non-editable box. |
3. In the case of Tools, expose the desired Tool's input port to be visible on the Canvas using the Show/Hide option.
Using Show/Hide Tool inputs option
4. Set the appropriate Input Node for the desired input and populate its value in one of the following ways:
Drag&Drop Input Node Adding (1)
- In the Left Sidebar (Inputs tab), according to the type of Library node's input, find appropriate Input node and add it to Canvas (drag and drop).
- Connect it with the Library node by hovering over the port on the Input node and dragging it to the input port of the Library node;
- Single-click on the Input node, and set its value in Right Sidebar.
Setting domain parameter for amass tool - drag and drop
Drag&Pull Input Node Adding (2)
- Hover over the input port on the Library node you want to set and drag from port to the empty space in Canvas. Release. Input Node will be created and shown.
- Single-click on the Input node, and set its value in Right Sidebar.
Setting domain parameter for amass tool - drag and pull from port
Example - setting amass tool inputs
Let's see how to set up amass tool with trickest.com domain, with a passive flag (activated with Boolean node) and this resolver file (previously uploaded to Platform using principals from Uploading and using private files).
Setting amass tool inputs in workflow
4. Nodes command line
Click on the Node in Canvas to see its traditional command, at the bottom in CLI's COMMAND tab.
For Tool Node**, the command shown in CLI's COMMAND tab is **immutable** - it just reflects the selected tool and its parameters to give you a better insight.
For Script Node, the command shown in CLI's COMMAND tab is editable - script behaviour can be changed.
Bellow, you can see the command for the previously prepared amass tool.
/bin/amass enum -d trickest.com -passive -rf in/http-input-0/resolvers.txt
-o out/amass-0/output.txt
Build a Simple Content Discovery workflow tutorial
Using building principals from above, we create Simple Content Discovery workflow, available also in Library. Check Getting started with Trickest - Simple Content Discovery, and try build it by yourself step by step: