
Imagine this scenario: You innocently type a familiar website address into your browser, expecting to access your favorite shopping site. You browse through the product catalog, enter your payment details, and complete the transaction, only to realize later that you've been duped. It turns out the website was a well-crafted clone designed to trick unsuspecting shoppers like yourself. This is a classic case that demonstrates the consequences of a DNS takeover.
According to the 2021 Global DNS Threat report by security firm EfficientIP, nearly 90% of organizations experienced DNS attacks in 2021. The aftermath? Well, let's just say it's not pretty. Think of financial losses, reputational damage, and even legal troubles. Therefore, it is crucial for Organizations to understand this threat and take proactive steps to mitigate the risks.
With Trickest's automated workflows, you can have peace of mind and protect yourself from DNS takeover, safeguarding your online domain. In this blog post, we will share how to build a supportive workflow, but also other practical strategies and best practices to mitigate the risks associated with DNS takeover. By implementing all of these, you can strengthen the security of your website and safeguard your valuable assets.
DNS Takeover: A Summary
*DNS takeover, or DNS hijacking, refers to the unauthorized takeover of a domain's DNS settings by malicious actors. This attack allows them to redirect the incoming traffic of your website, potentially leading visitors to fraudulent or malicious destinations. This can be done by exploiting vulnerabilities in the DNS infrastructure (or, well, Phishing).
Wait, then what is Subdomain Takeover?
Let's just look at it with an example:
DNS takeover is like someone manipulating the mall directory, which guides visitors to the different stores. They tamper with the directory, changing the store names and their respective locations. As a result, customers end up going to the wrong stores, potentially causing confusion and frustration.
On the other hand, a Subdomain Takeover is comparable to a situation where a store closes down in the mall, but the mall management forgets to remove the signage for that store. Another person with malicious intent notices this and decides to occupy the vacant store without permission. They take control of the space, pretending to be the legitimate store owner.
In summary, DNS takeover involves manipulating the mall directory to misdirect visitors to incorrect stores, while subdomain takeover occurs when unauthorized individuals occupy a vacant store (subdomain) within the mall (website) after it has been abandoned or forgotten.
The impact and consequences of a DNS takeover can be much more severe than those of a subdomain takeover.
Now, before we get into DNS takeovers and DNS hijacking, we will cover what is a DNS Server.
DNS Server
A DNS server basically translates Domain names into IP addresses, enabling smooth internet communication.
Imagine you are the manager of a large library that houses numerous books, each representing a website. To help people find the right books quickly, you have a system in place with librarians and categorized sections.
DNS servers are like the librarians in your library. They have a vast knowledge of where each book is located in the library. When someone wants to find a specific book (access a website), they approach a librarian (DNS server) and provide the title (domain name). The librarian then looks up the catalog (DNS database) and provides the correct shelf number (IP address) where the book (website) can be found.
A DNS server has several other functions, such as caching, load balancing, security, and more. However, these are beyond the scope of this blog post.
The Resolution
The DNS resolution process involves the collaboration of four essential servers to provide the client with the necessary IP information.
- Recursive resolvers
- Root nameservers
- TLD nameservers
- Authoritative nameservers
Imagine you're trying to visit the website trickest.com and your device doesn't have the IP address cached. Let's dive into the DNS resolution process without caching:
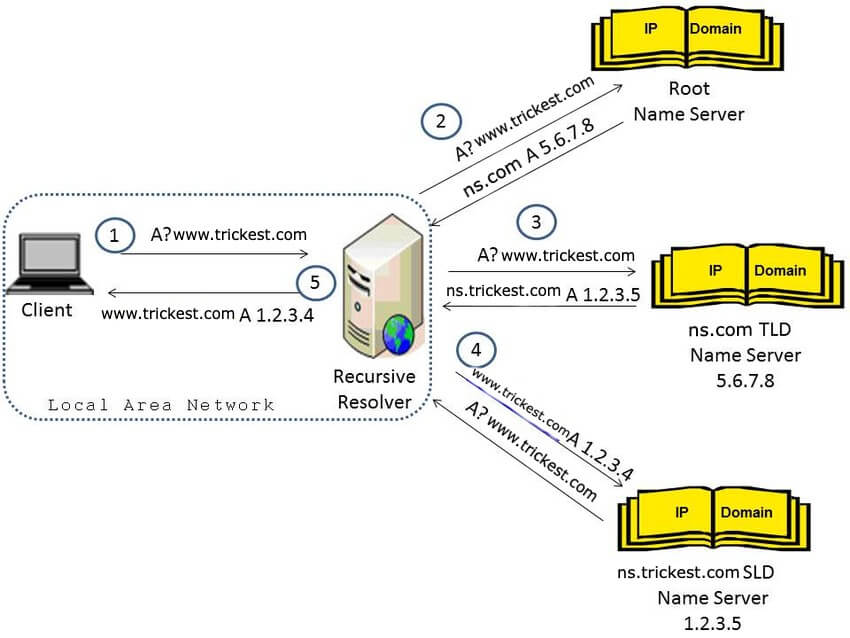
-
You enter
trickest.comin your web browser, triggering a DNS query to your configured DNS server to fetch the IP address -
The DNS server receives the query and initiates the DNS resolution process to retrieve the IP address
-
Since there's no caching involved in this example, the DNS server proceeds to perform the necessary steps for resolution
-
Acting as a trusted intermediary, the DNS server sends a recursive query to the root DNS server, seeking the IP address of the top-level domain (TLD) ".com"
-
The root DNS server responds with the IP address of the authoritative DNS server responsible for the ".com" TLD
-
Continuing the resolution process, the DNS server sends another recursive query to the authoritative DNS server for `trickest.com`` to acquire the IP address of the domain
-
The authoritative DNS server retrieves the IP address associated with
trickest.comfrom its records -
The authoritative DNS server shares the IP address with the DNS server
-
Finally, the DNS server delivers the obtained IP address back to your device
-
With the IP address in hand, your device establishes a connection to the web server hosting
trickest.com -
You can now access the website content
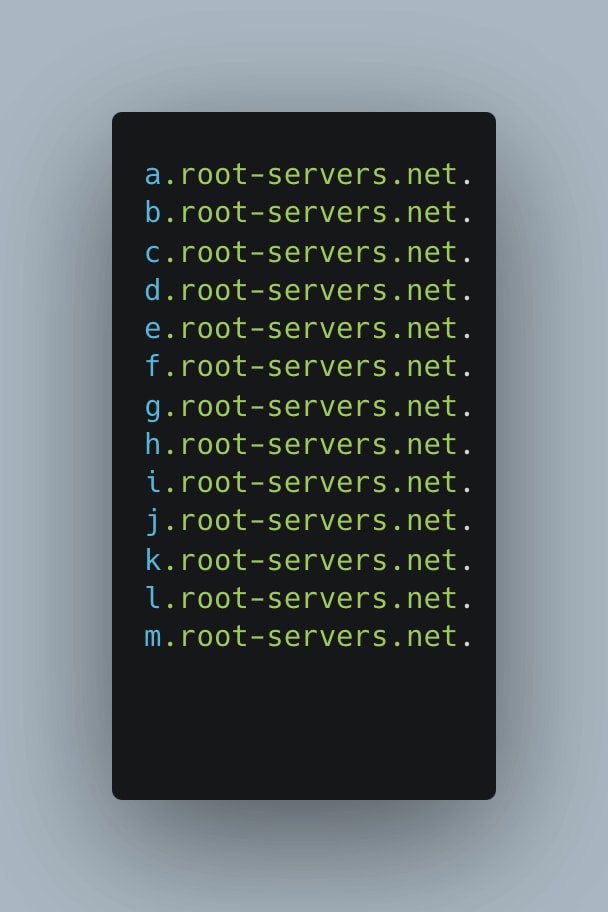
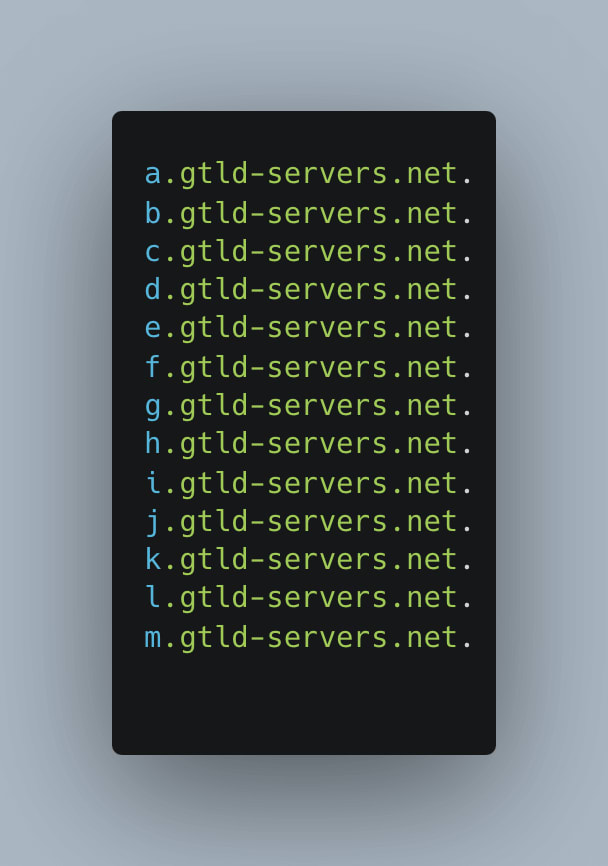
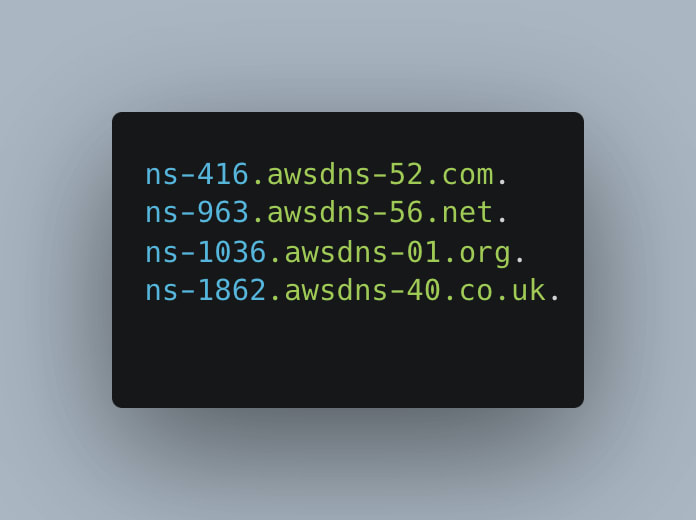
This DNS resolution process ensures the retrieval of the correct IP address, allowing you to securely connect to the desired website.
Letting DNS Take Over
In a DNS takeover, someone unauthorized takes control of a specific DNS server involved in the DNS Translation process. To achieve this, they target and gain control over any one of the servers involved in the translation process.
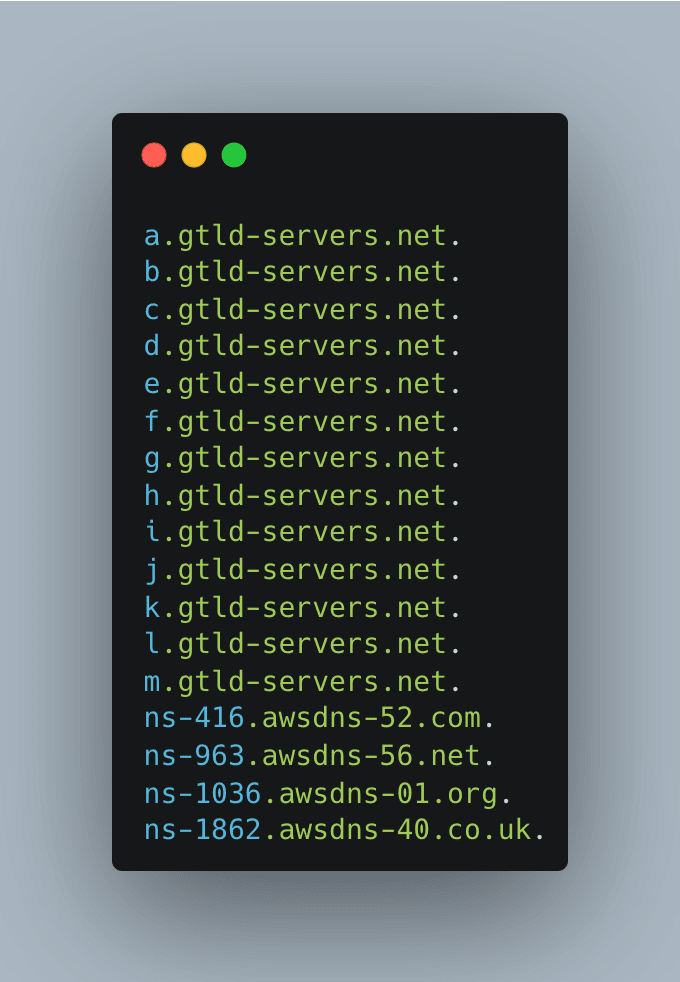
Let's use the example of trickest.thehackrspace.com to illustrate a DNS takeover with dangling NS records:
-
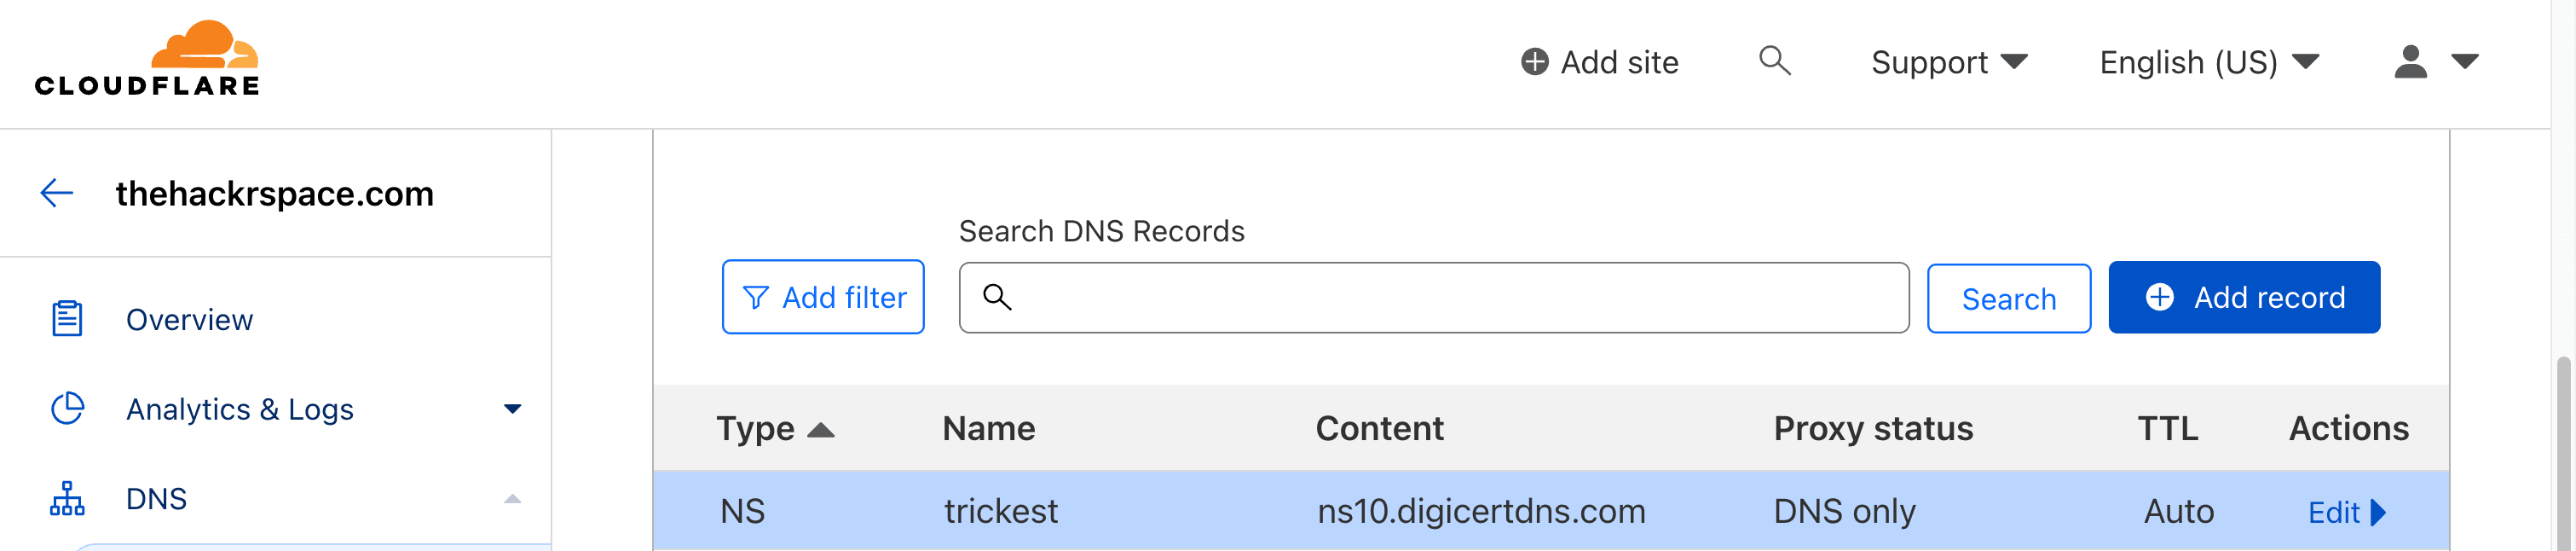
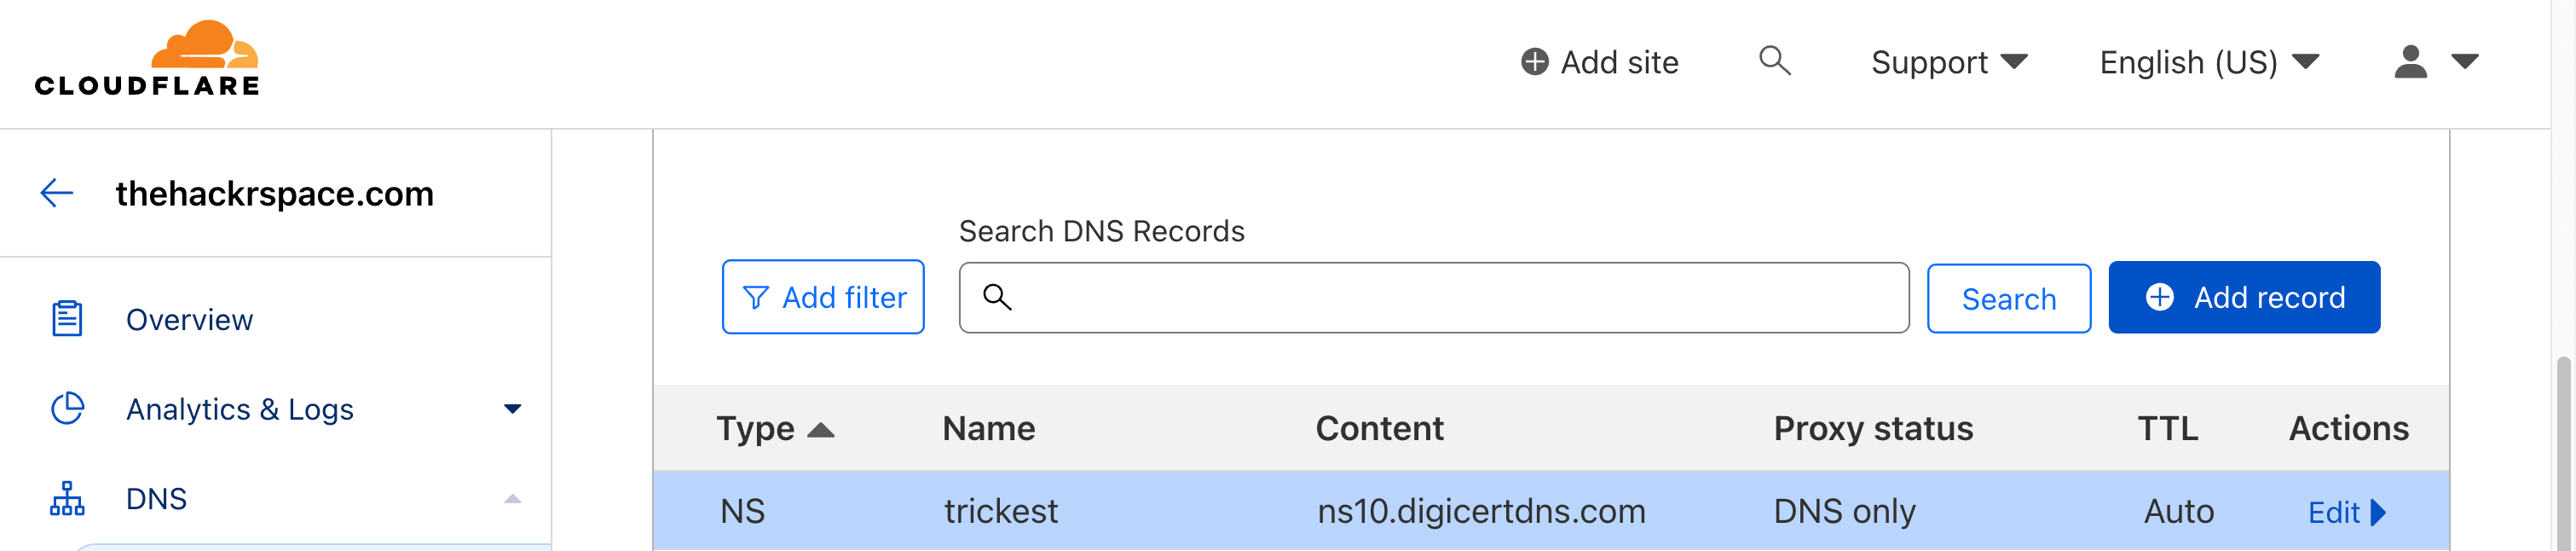
DNS Setup: The domain owner of trickest.thehackrspace.com initially sets up DNS records, including NS records, to associate the domain with authoritative name servers responsible for managing its DNS.
Adds the assigned NS records to their Domain to use the Service (can be done via WHM, Cpanel or so)
-
Changes or Termination: The domain owner decides to switch to different name servers or terminate a service associated with
trickest.thehackrspace.com. However, they forget to remove the NS records pointing to the old name servers. -
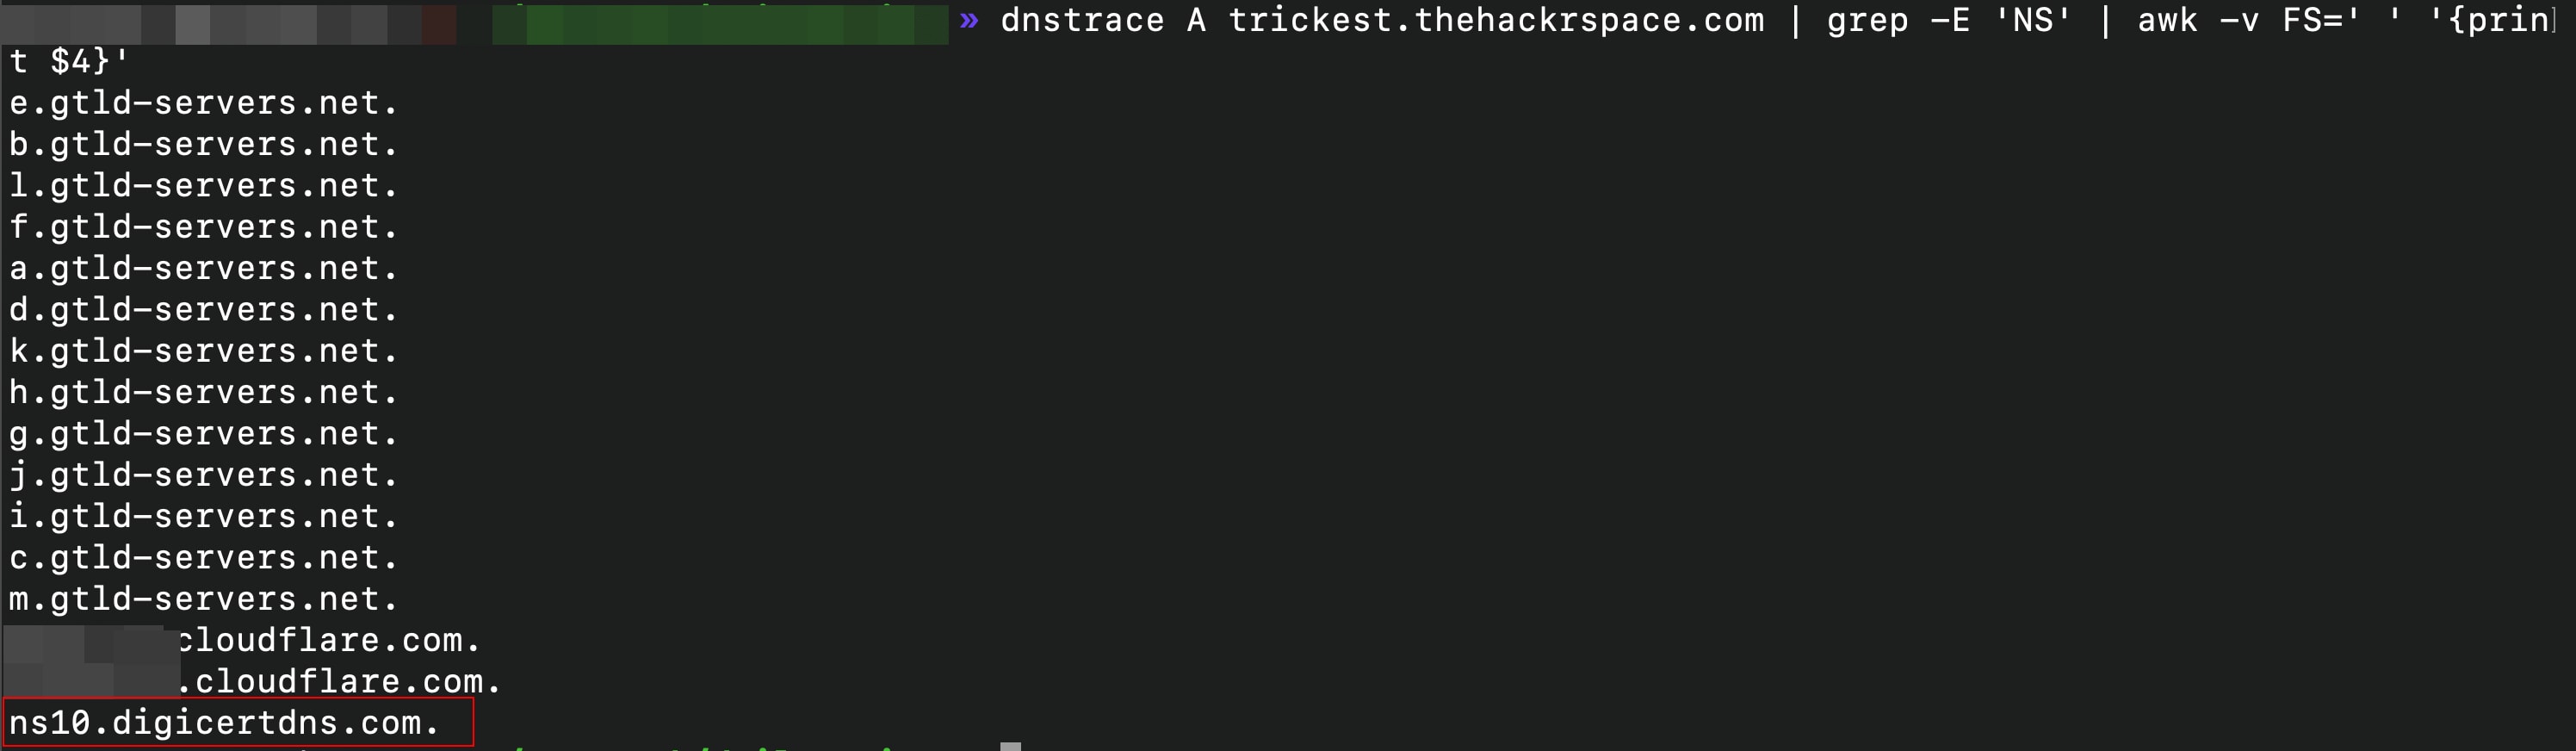
Forgotten NS Records: The NS records for the old name servers are left "dangling" or pointing to unused or non-existent name servers.
-
Attacker's Enumeration: An attacker notices the dangling NS records for `trickest.thehackrspace.com``.
-
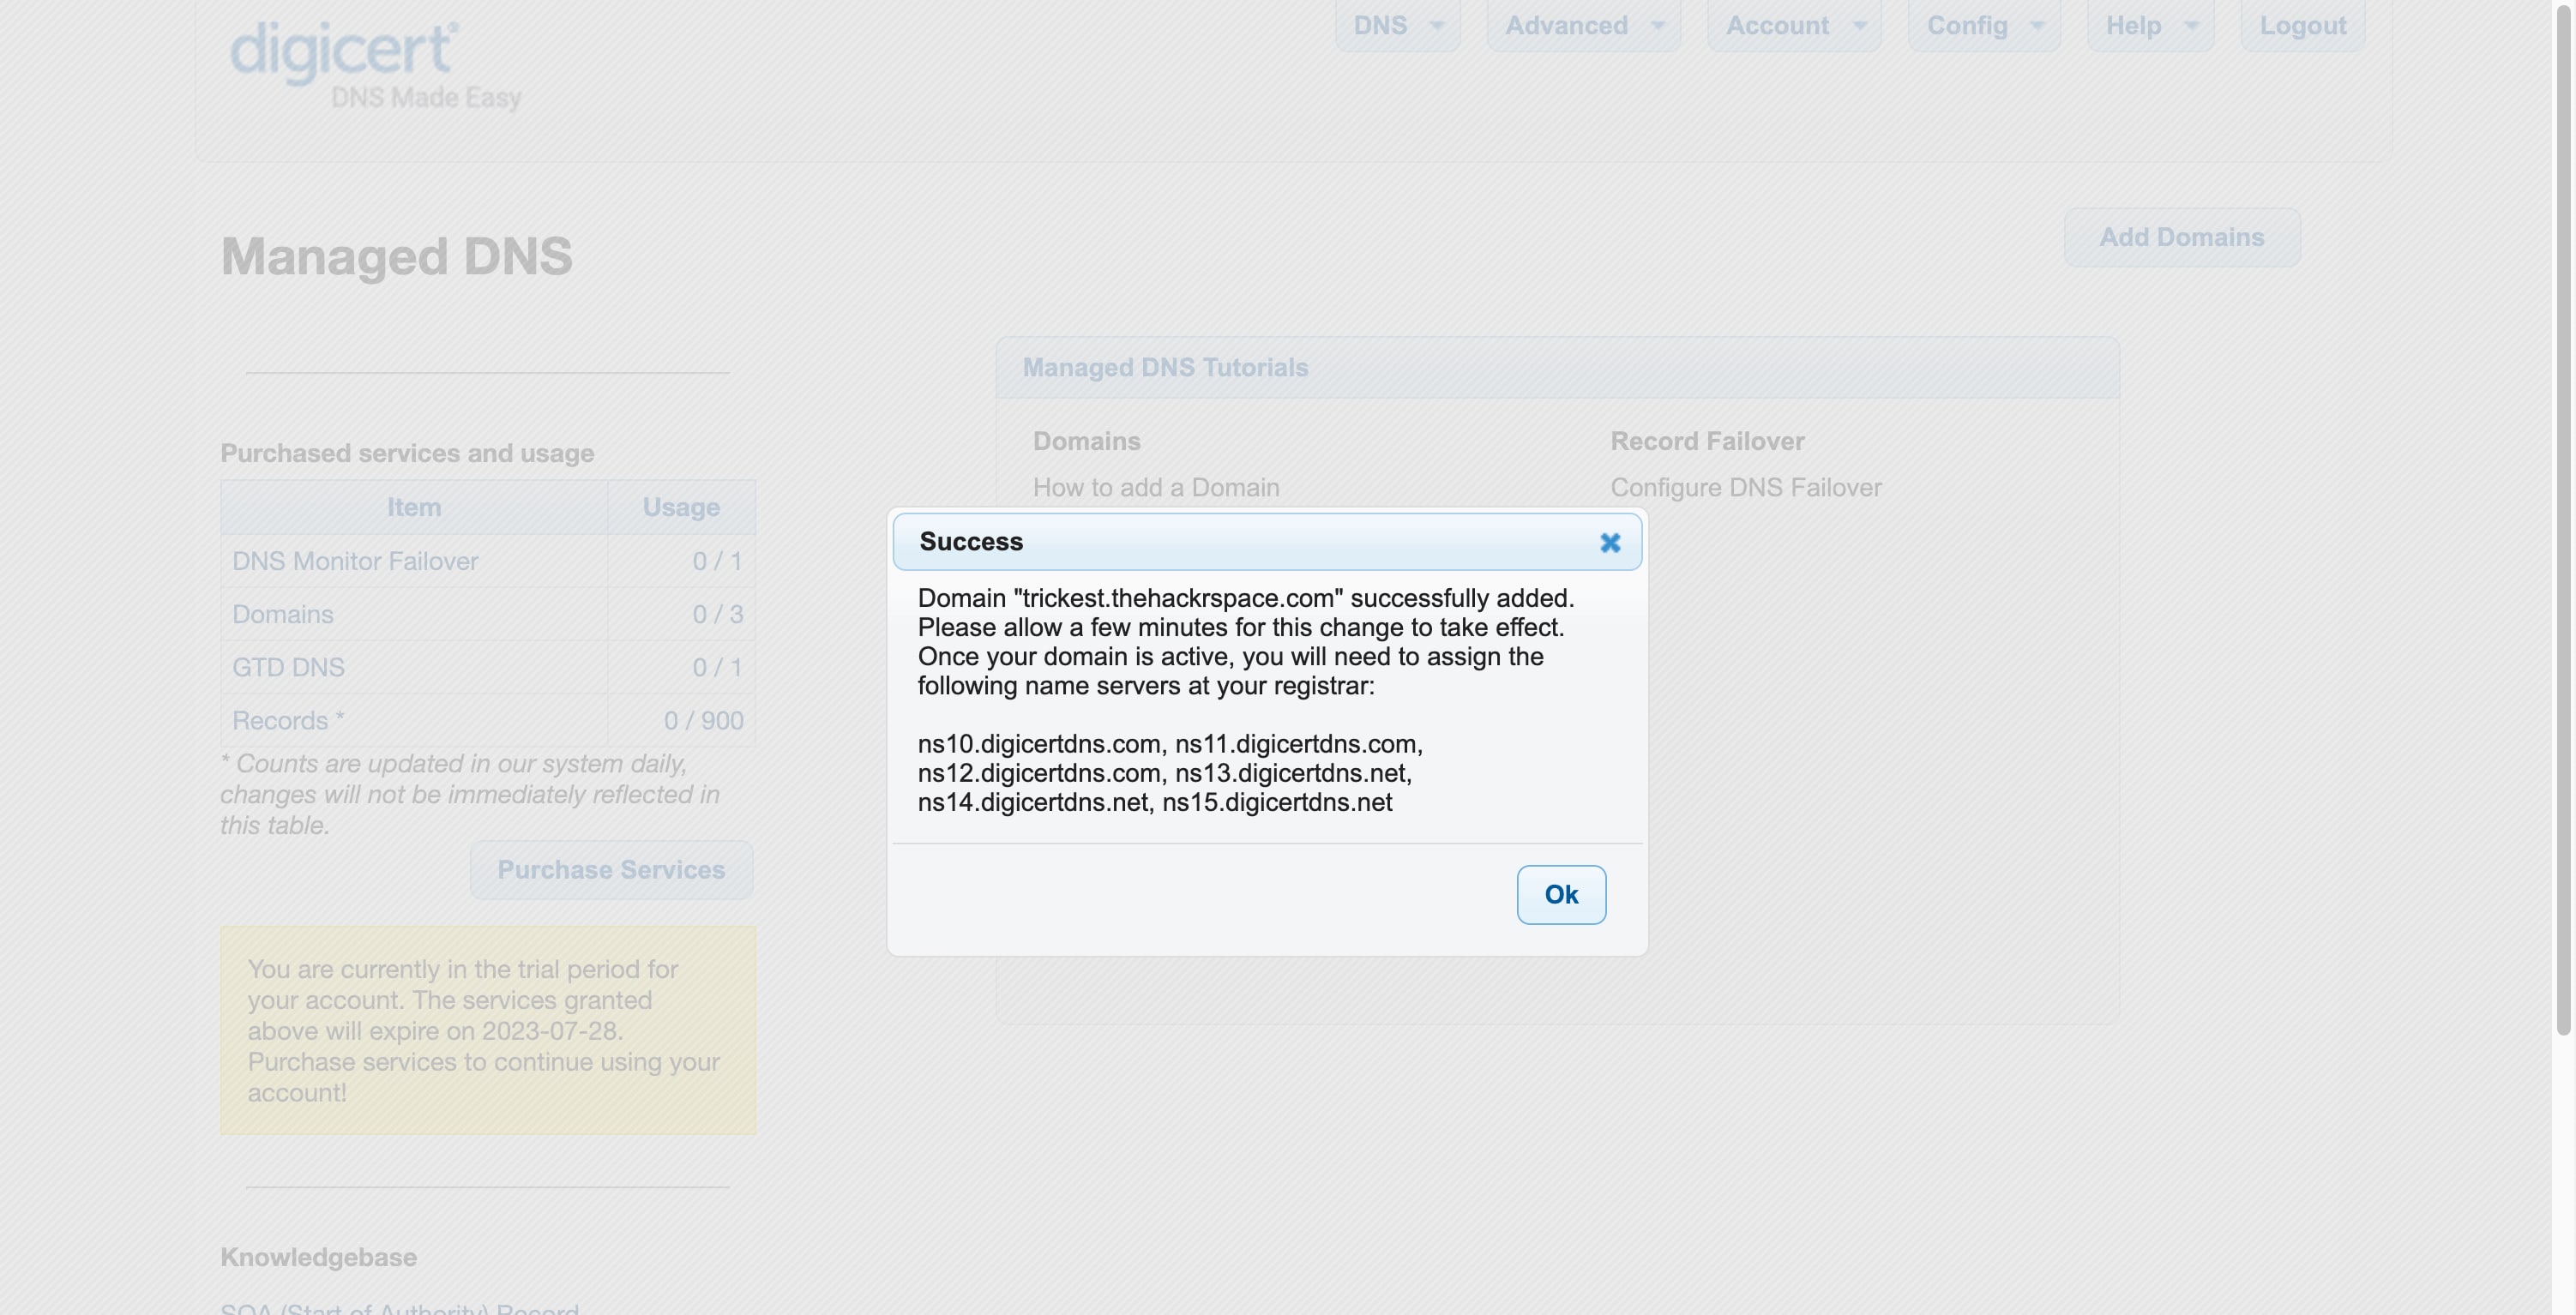
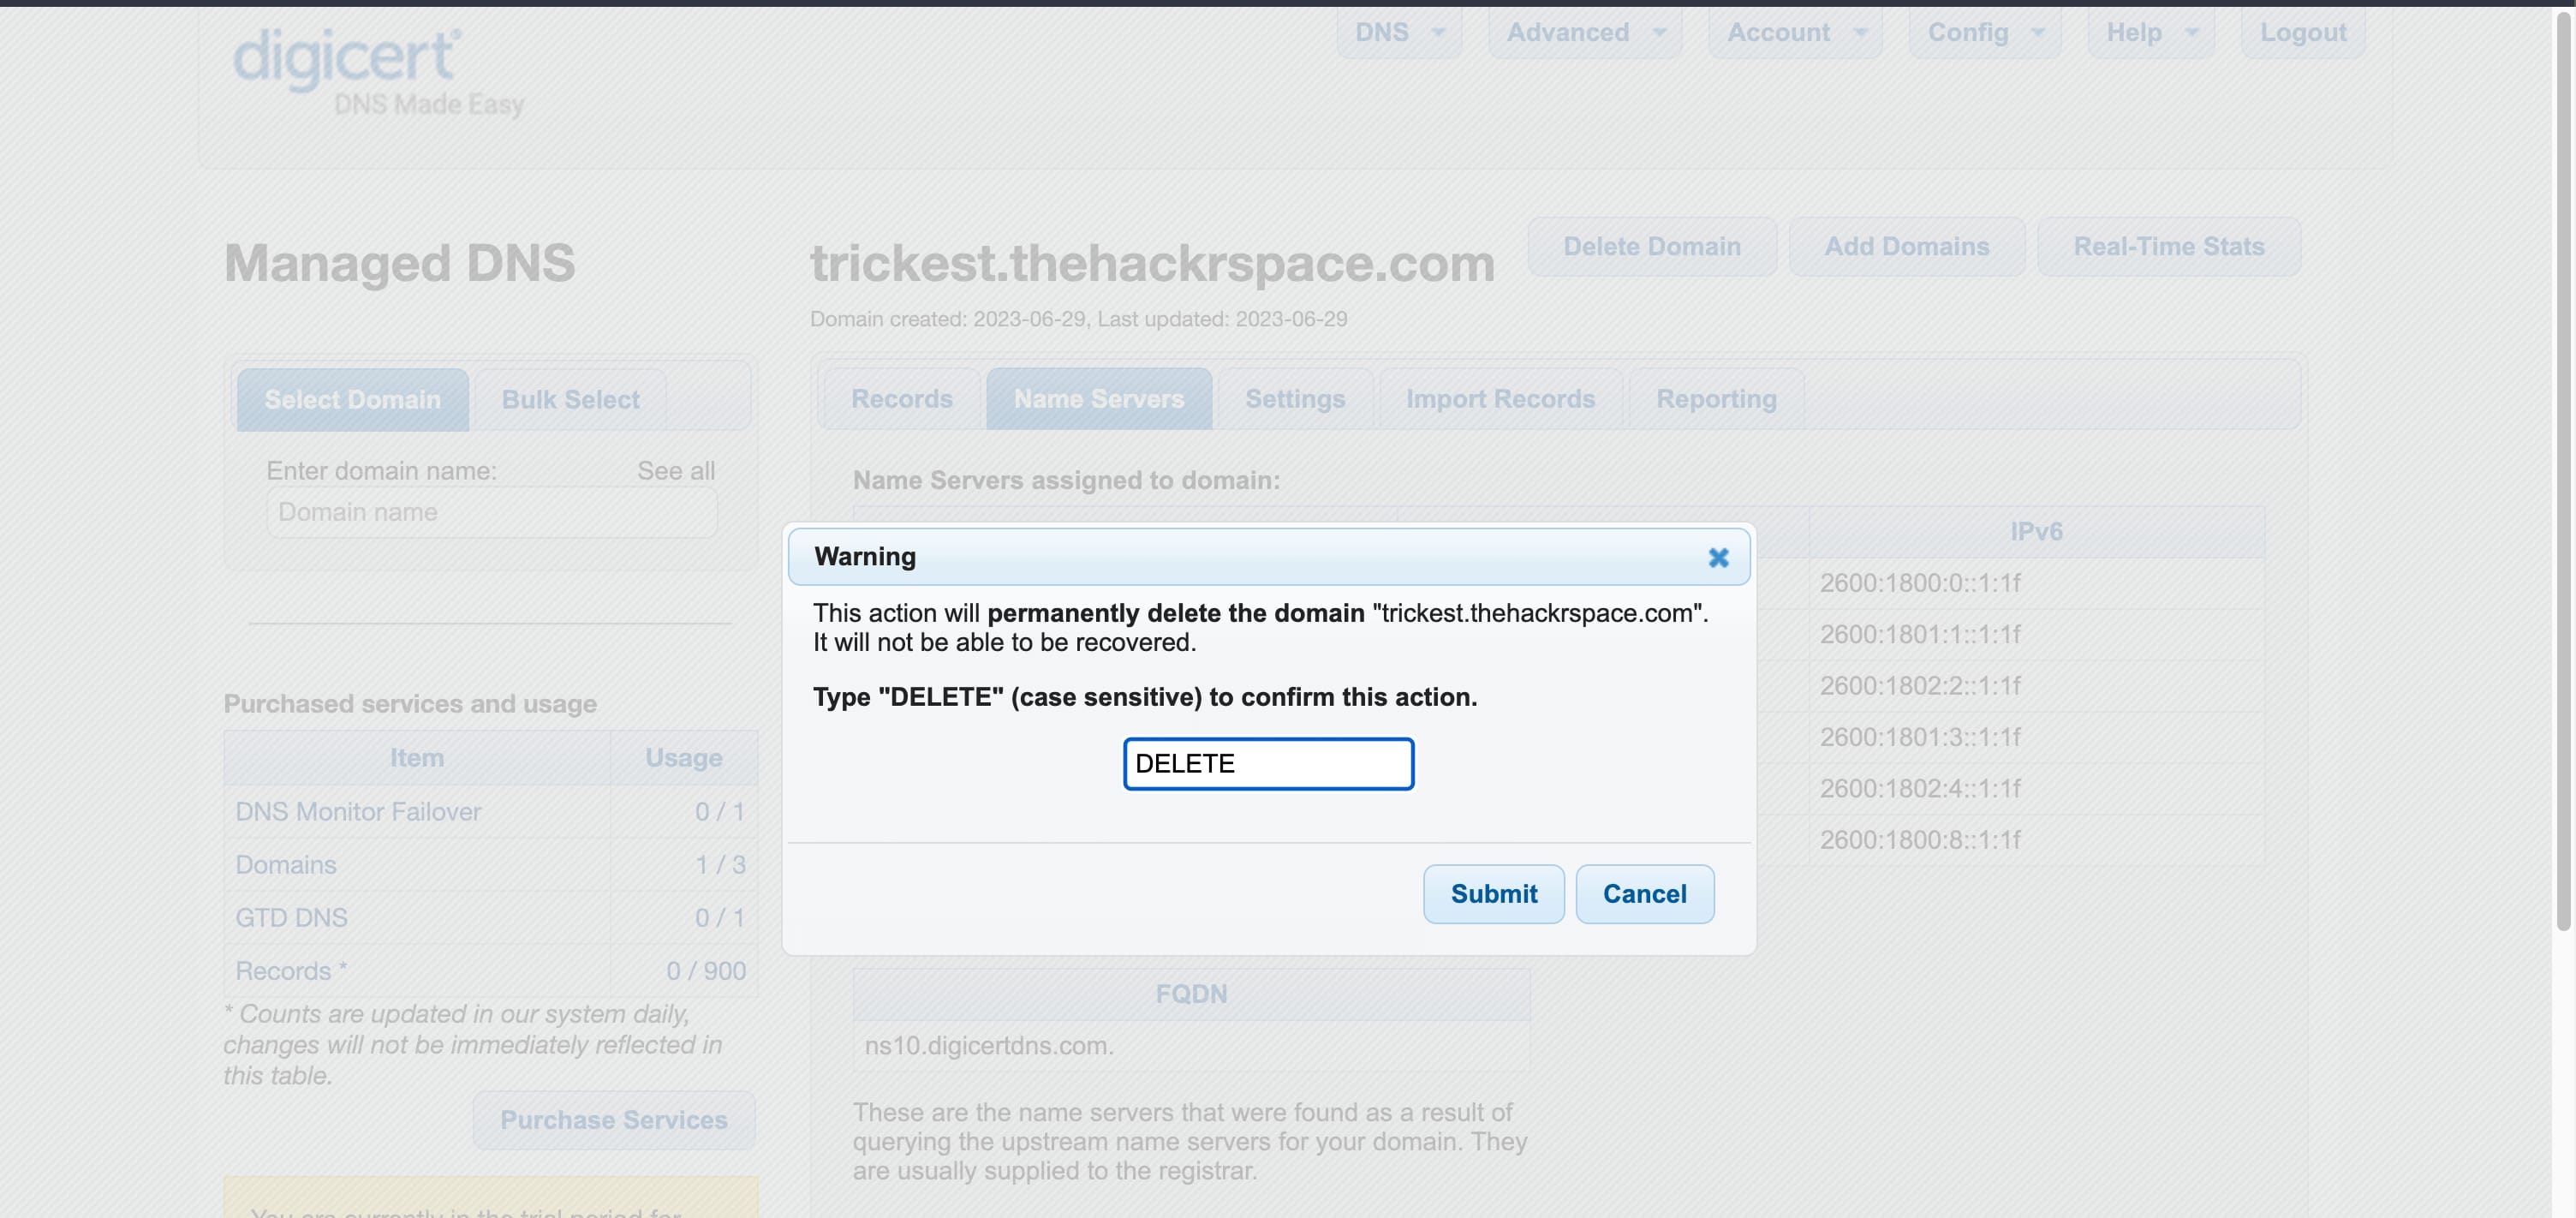
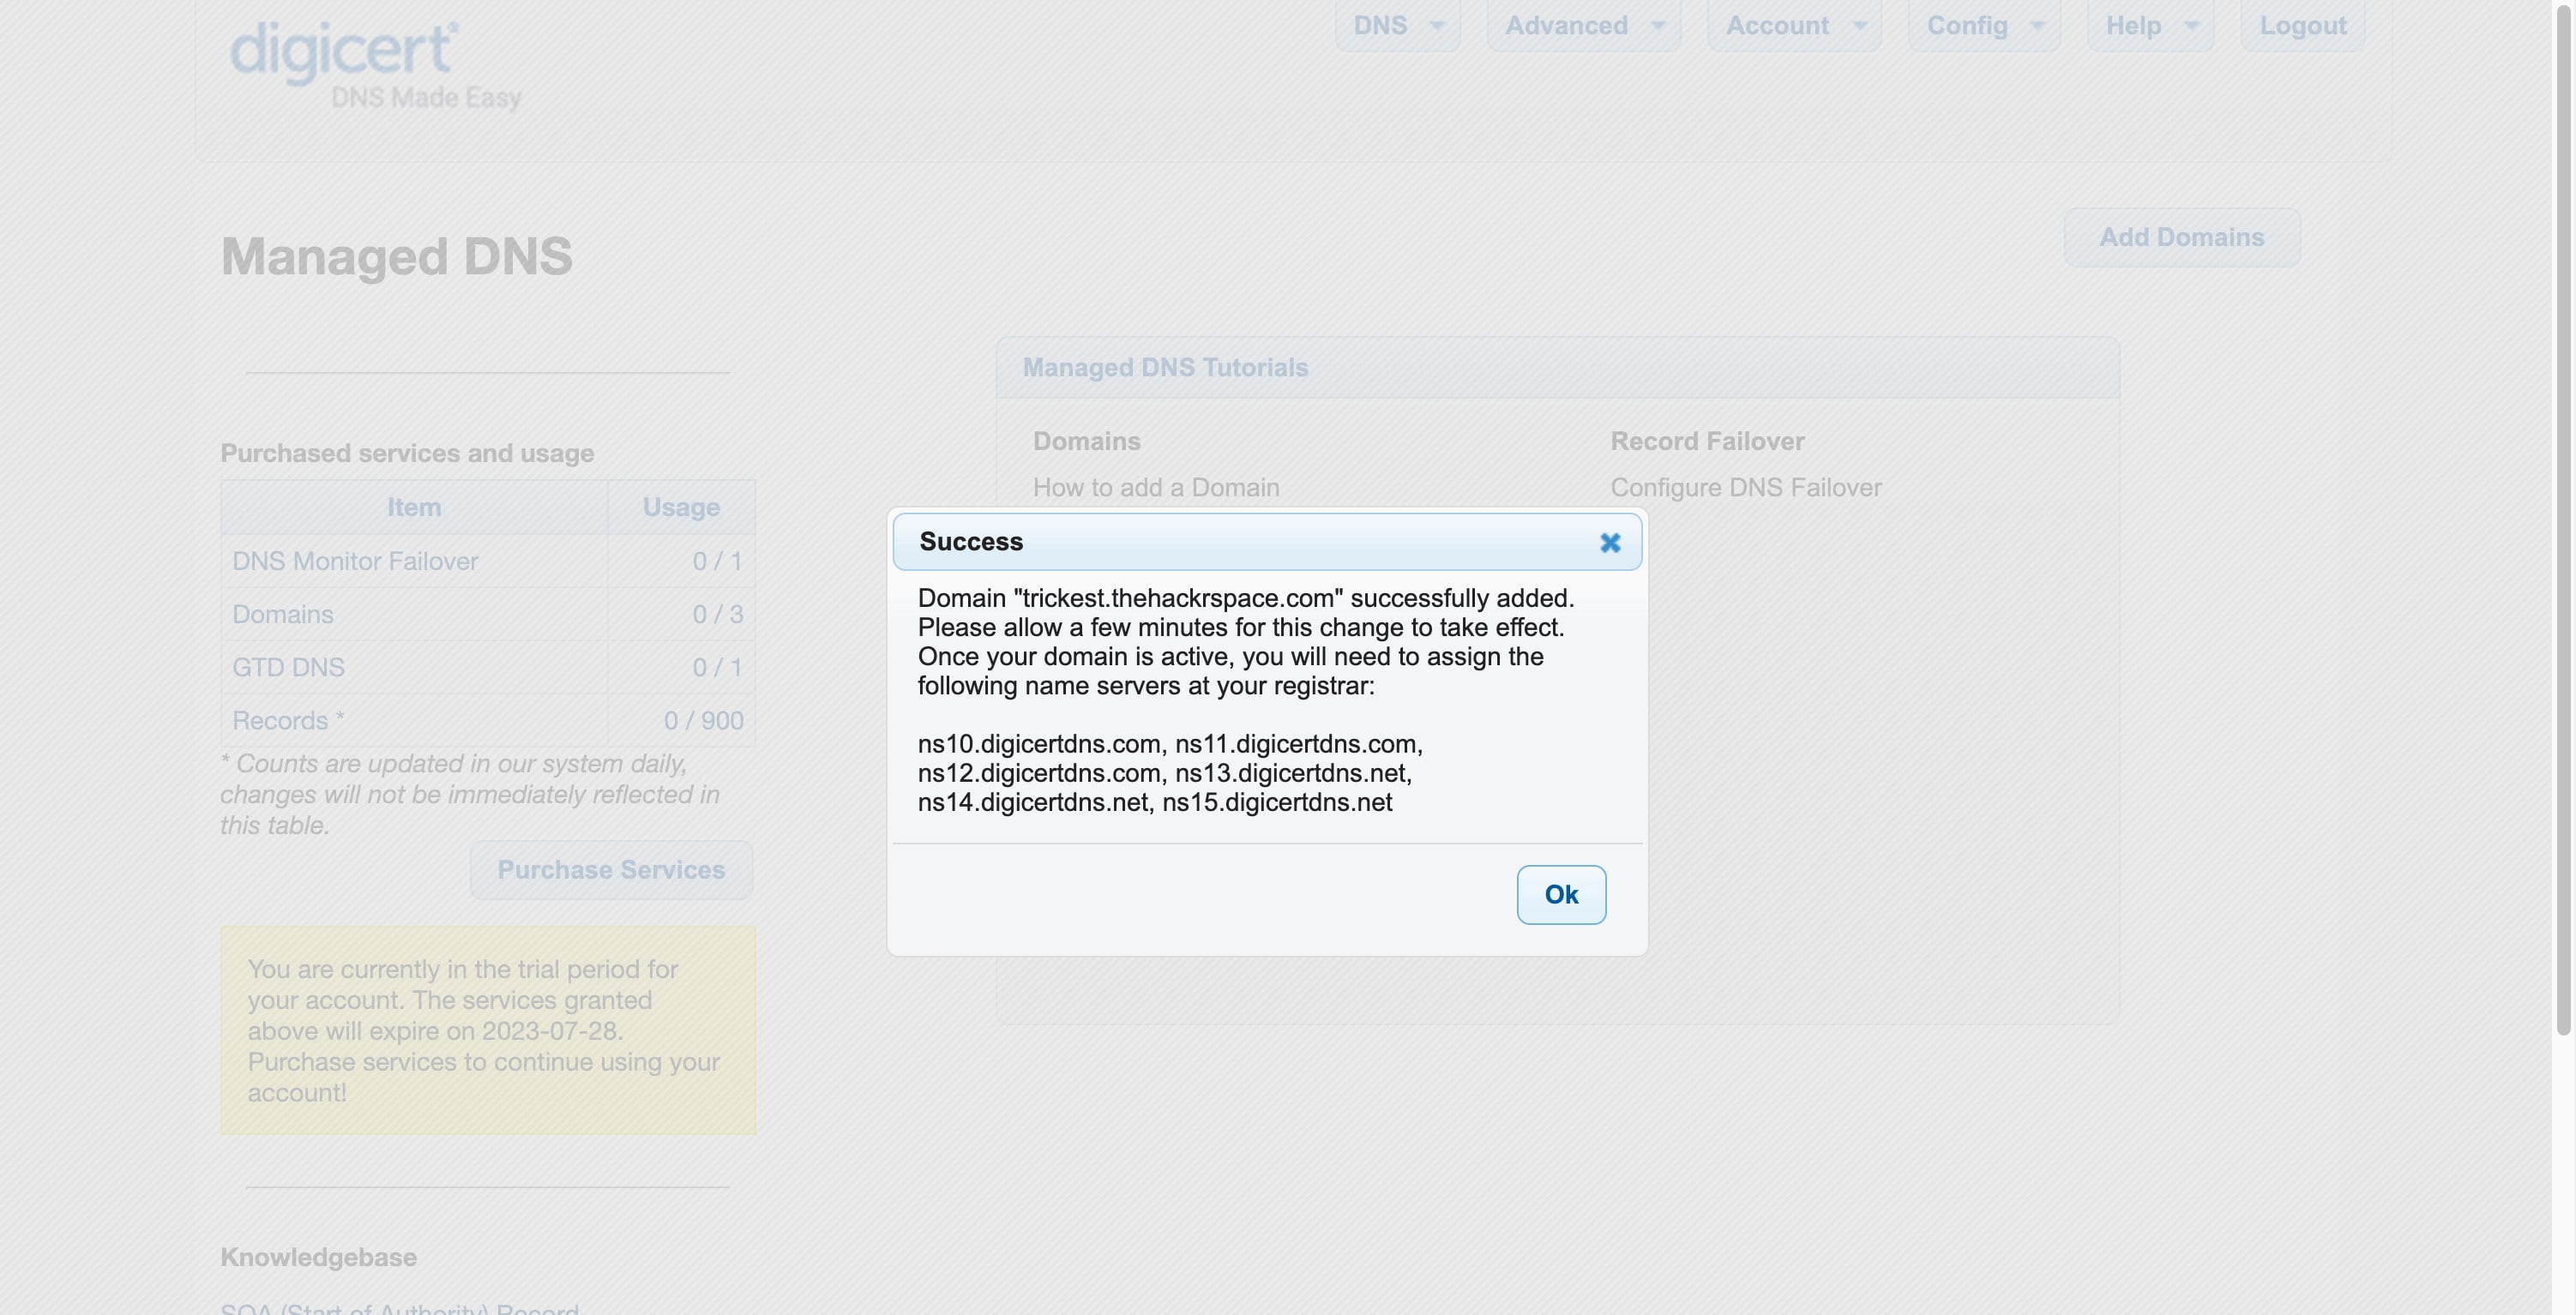
Controlling DNS: The attacker registers a domain called
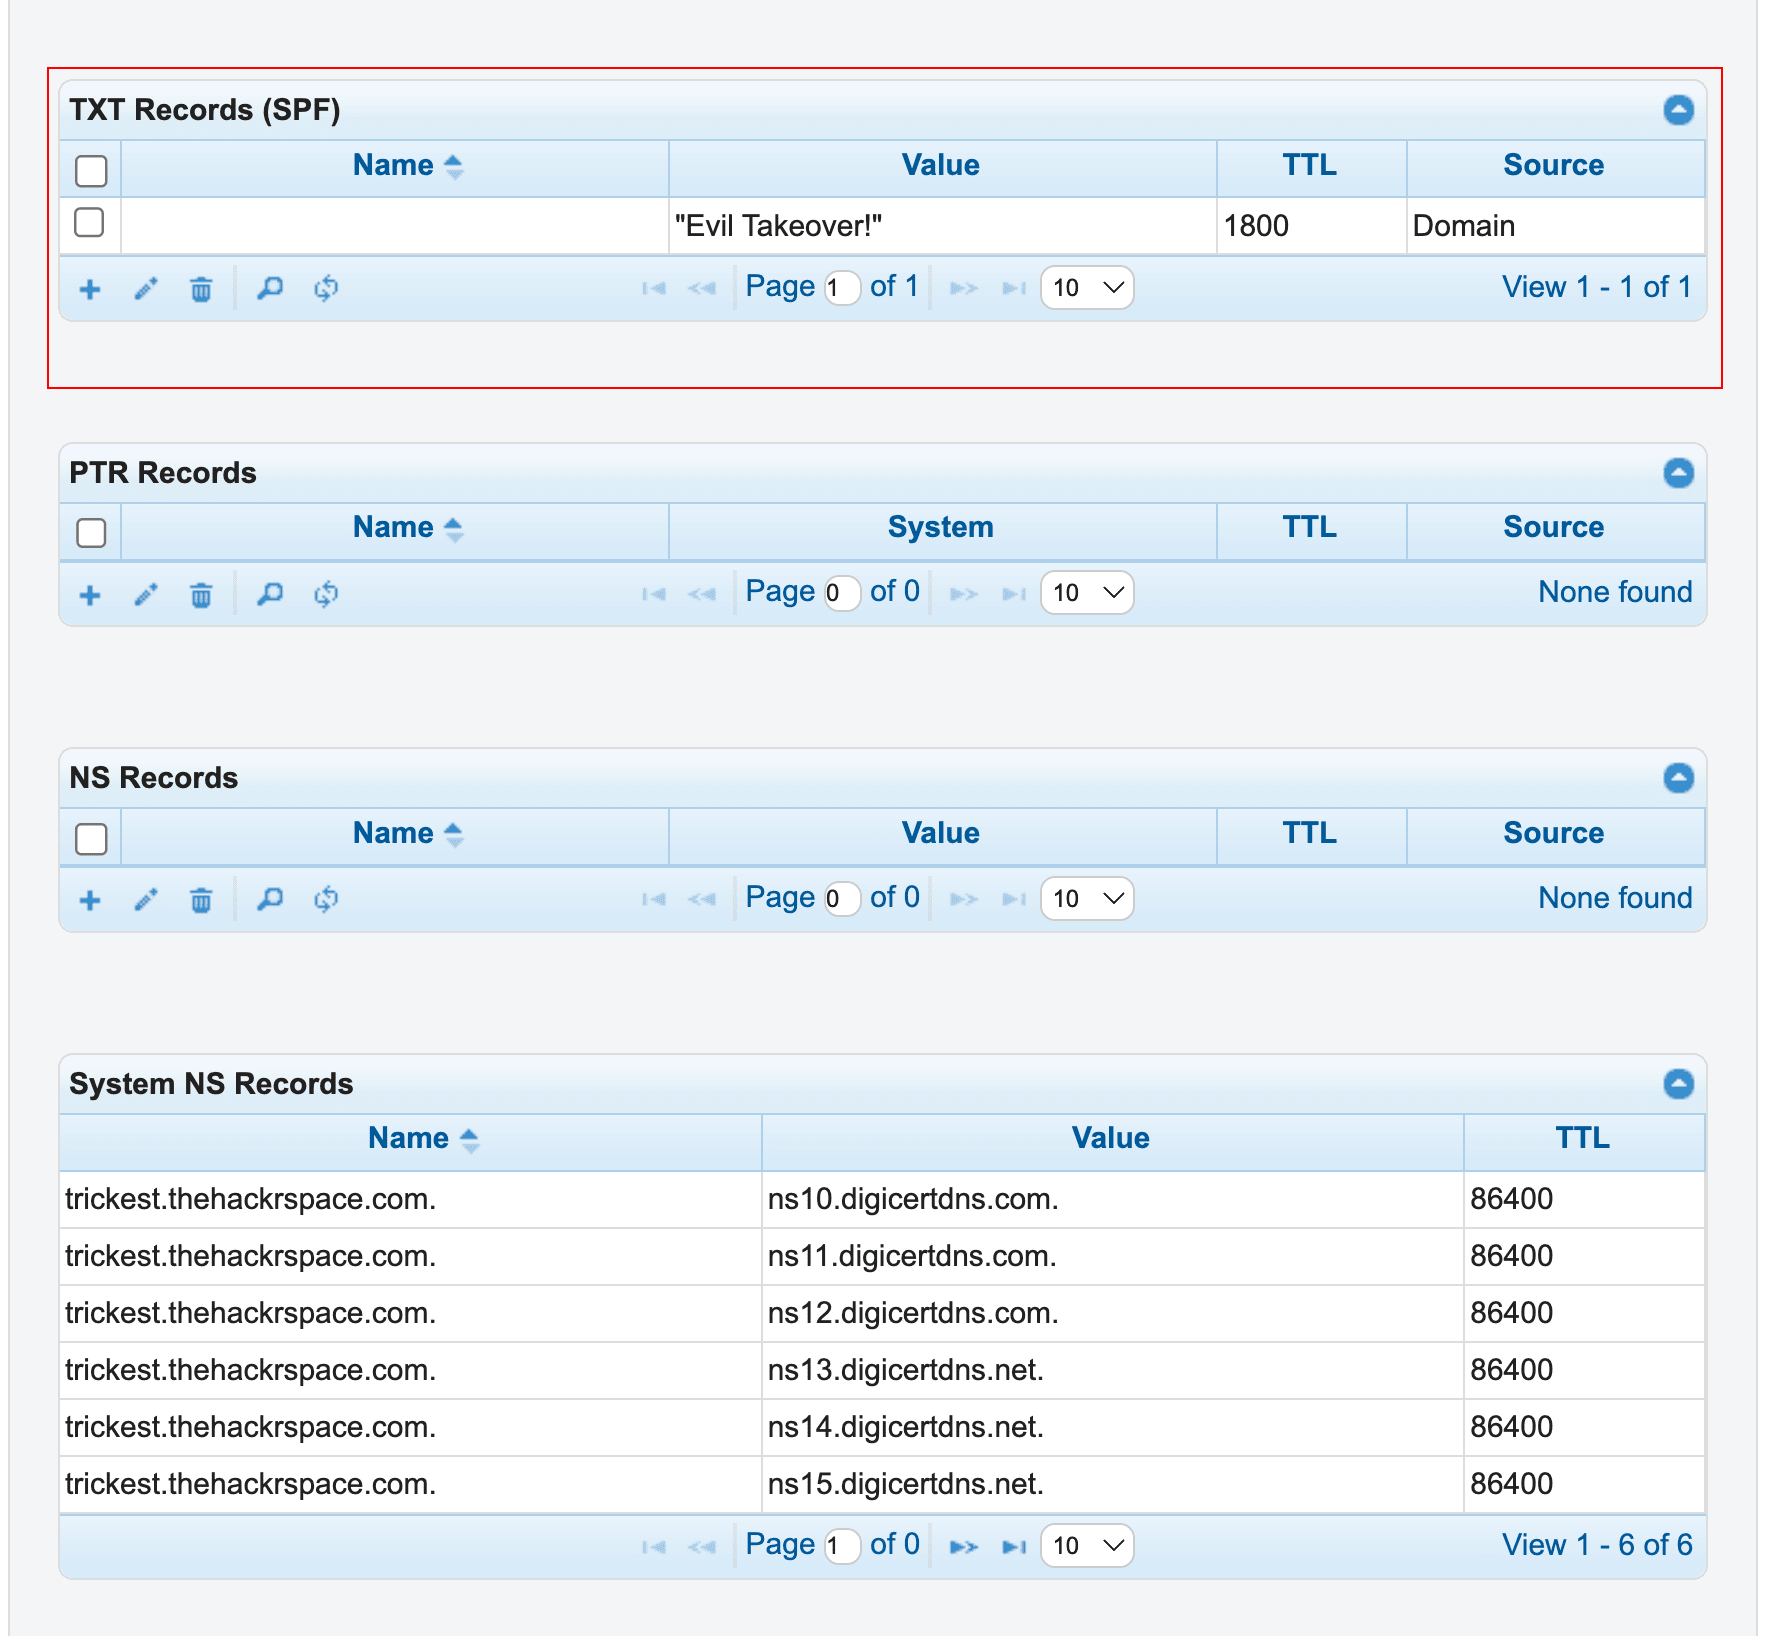
ns10.digicertdns.com., which matches one of the forgotten name servers. Further, they set up their own authoritative DNS server forns10.digicertdns.com.and configured it to respond to DNS queries fortrickest.thehackrspace.com(or they just register on the same 3rd Party Service). -
Manipulating DNS: The attacker manipulates DNS responses from their server for example.com. They can redirect visitors to malicious websites, intercept communications, or carry out other nefarious activities.


So What’s up for Grabs? - Identifying Potential Targets
When attempting to detect vulnerable domains, it's important to note that not all services are vulnerable. The specific methods used to detect vulnerabilities will vary depending on the associated service. Here’s a neatly maintained list of services known to be vulnerable or not to DNS Takeovers and “How-to(s)” for them.
To achieve a successful takeover in an ideal scenario, it's crucial that the Authoritative Nameservers are associated with one of the vulnerable services listed.
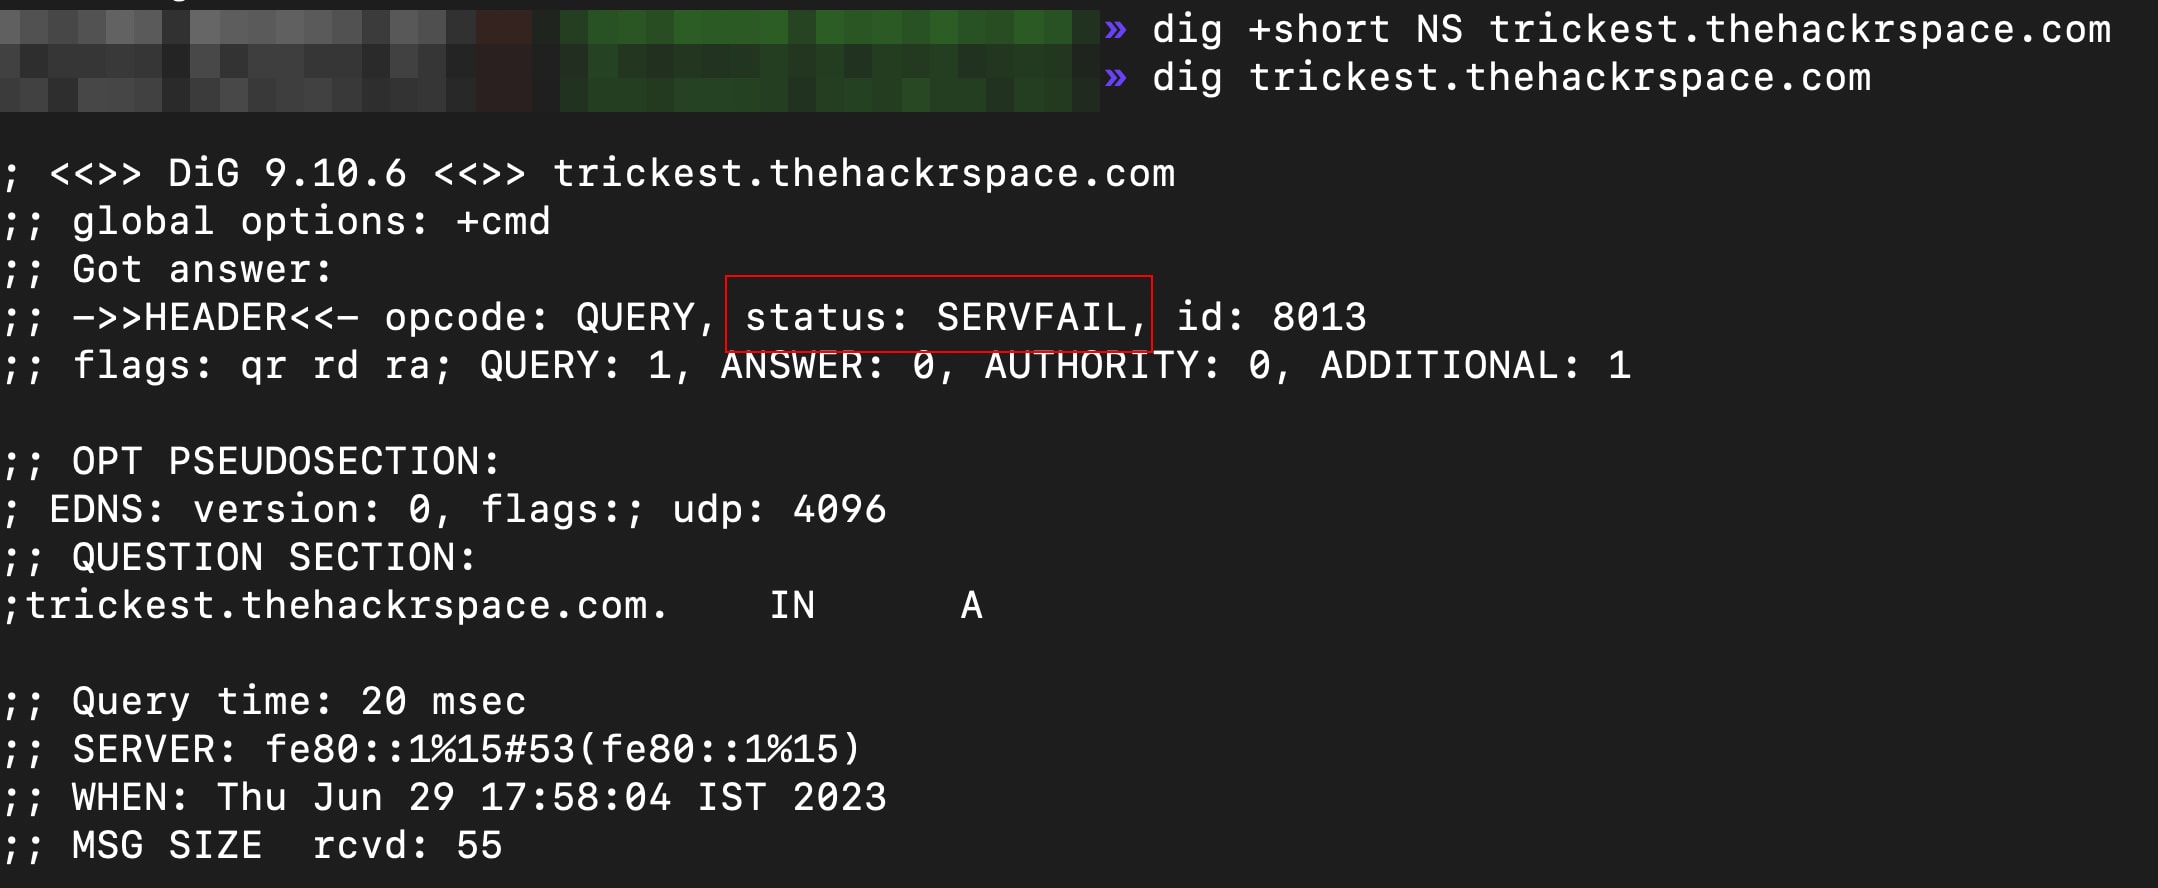
But a strong reliable red flag for potential issues or suspicious activity is to check if it responds with a SERVFAIL (or occasionally REFUSED) on trying to resolve it.
The Detection: A Breeze
In our attempt to detect vulnerable domains from a large pool of available options, we explored several different methods. Here's what we attempted.
Approach #1 - Nuclei + dnsX
In this approach, we build the following:
- Gather the vulnerable hosts using the Nuclei tool to gather all the Hosts returning
servfailorrefused. - Parse the Hosts from the output and pass them to dnsX to fetch their Nameservers.
However, there seemed to be some issues with the execution, probably taking too long and it was a FAIL.
Approach #2: The dnsX way
In this approach, we used DnsX, from detecting potentially vulnerable domains to fetching their Nameserver Records.
dnsX - is a fast and multi-purpose DNS toolkit designed for running various probes through the retryabledns library. It supports multiple DNS queries, user-supplied resolvers, DNS wildcard filtering like shuffledns, etc.
-
We provide a list of hosts as input. Here, we have provided a hosts file with ~7m lines containing hosts from Zendesk. The list of hosts was picked up from the Chaos Dataset.
-
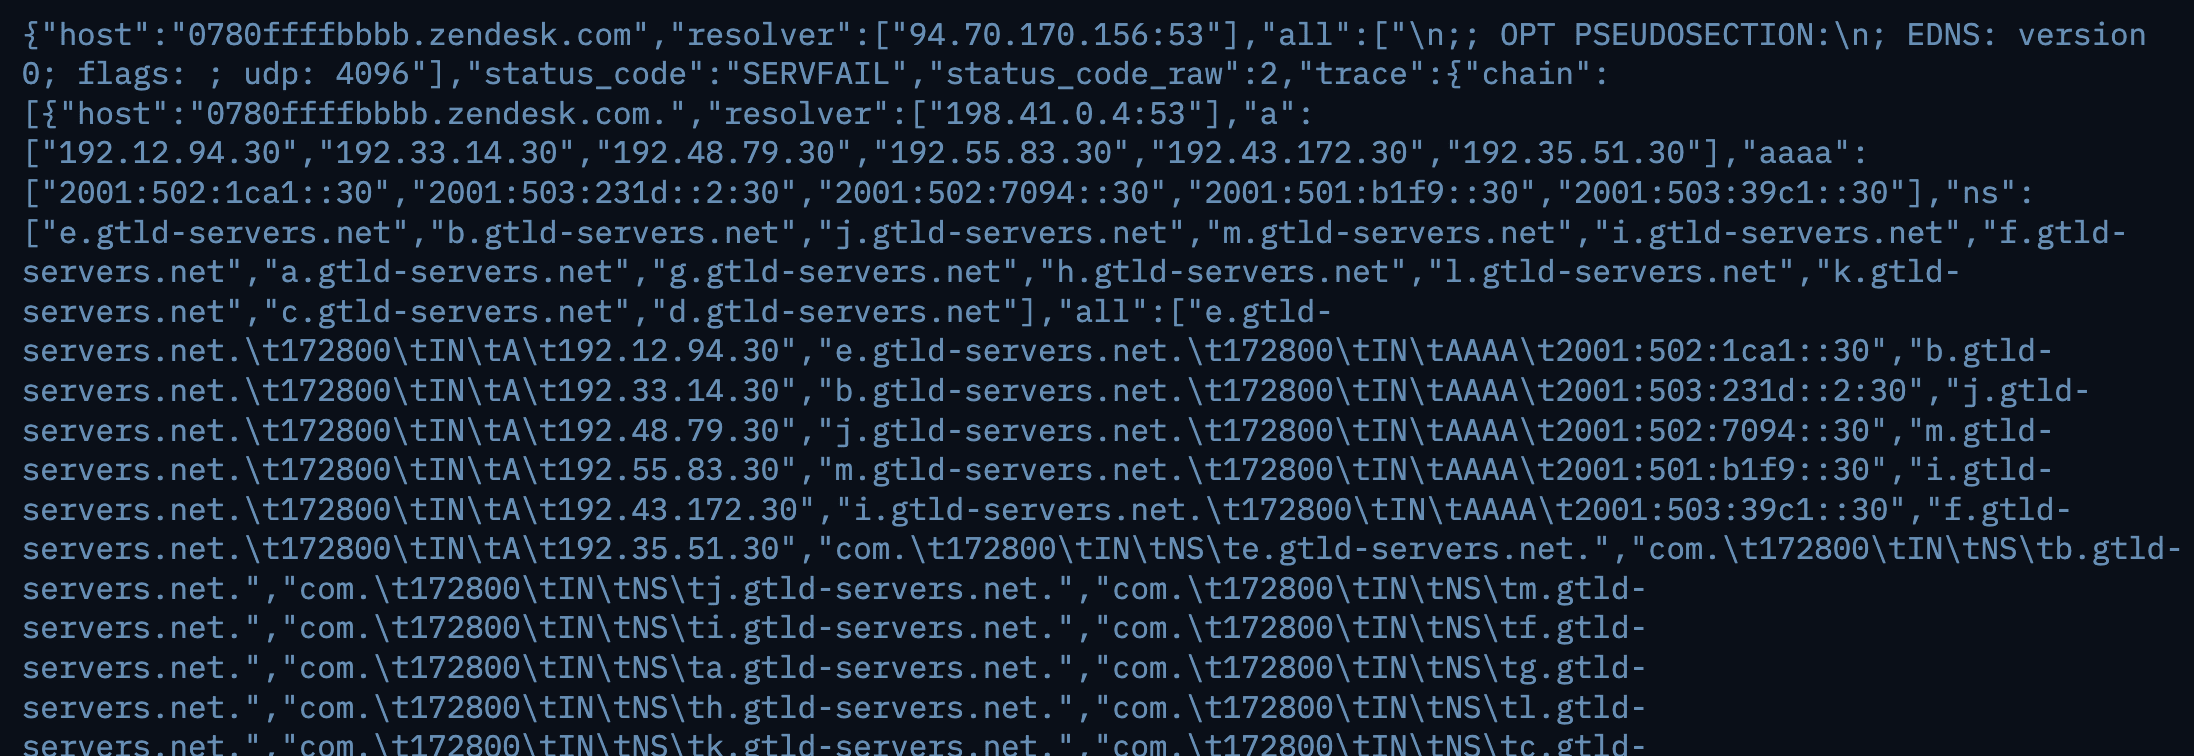
We use dnsX with the following flags, and it gives us a neat json output.
-json- Save the output in json-rcode- Fetch only those hosts which respond with eitherservfailorrefused-trace- Enable DNS Trace-t- use 500 threads-ns- Fetch only the nameservers-r- Resolvers file-l- Input file-o- Output file
-
Using
jq, we extract only the Hostnames along with the NS Servers. -
Finally we get a Clean
68.8MBtxt file with all the hostnames that responded withservfailorrefusedand their respective Nameservers.
The workflow contained of 1 Large and 1 Small Machine and completed the execution with ~7m hosts in almost 4.4 hours.
Approach #3: The dnsReaper Way
In this approach, we used dnsReaper by Punk Security. The only difference is that dnsReaper by default detects both Dangling DNS and even CNAME Records.
- dnsreaper - An extremely fast and accurate Takeover tool
-
We provide a list of domains/hosts as input. (7026912 hosts)
-
From the Input file, we create Line Batches, i.e. splitting the input file into small batches and performing the execution in batches.
-
We pass those Batches as input to dnsReaper with the following flags:
file --filename- Set input type as File and provide the path to File--parallelism- Number of Parallel executions--out stdout- Output to stdout>- Redirect stdout to txt file
-
Recursively cat all the batch files to get a combined CSV output file from all the batches.
The workflow contained of 1 large and 1 small machine and completed the execution with ~7m hosts in almost 5.4 hours.
The Outcome
Although it may seem insignificant, the ability to easily execute workflows is important. As more tools are utilized and files become larger, the process can become more challenging. It's not always the case that everyone is proficient in Bash. This was just a brief overview of the capabilities of Trickest. It has the potential to perform a variety of tasks:
- Having multiple workflows ready for the same thing in case something breaks
- Making this workflow more efficient using multiple machines or other tools
- Adding complete Subdomain Enumeration directly into this workflow
- Or even schedule automatic scans within defined intervals.
The DNS Takeover Solution
Securing everything during the initial setup may not seem too difficult, but as you dive into the intricate web of moving parts and engage with various third parties, ensuring ongoing security becomes quite a challenge. That said, here are some effective measures that can be incorporated into your regular maintenance routine to keep your organization secure.
Before delving into the technical aspects, let's add one last analogy to stimulate your mind.
Imagine your organization's infrastructure is like a house with multiple entry points, and the DNS (Domain Name System) serves as the front door. It's crucial to secure this entry point to protect your house from potential threats.
- Conduct periodic security checks on the front door to identify and remove any vulnerabilities - Regular DNS record audits
- Keeping unnecessary keys to the front door area removed or updated to prevent unauthorized access points - Maintaining clean DNS records
- Controlling the time window during which visitors can access the house after ringing the doorbell - Managing DNS Time-to-Live (TTL)
- Installing security cameras at the front door to continuously observe and detect any suspicious activities - Implementing DNS monitoring
- Creating a neighborhood watch program, educating residents about the importance of security, and encouraging them to report any unusual activities - Raising awareness
Now that's settled, let's dive into the technical details:
- Regular DNS Record Audits: Conduct thorough audits of your DNS records to identify and remove any dangling or misconfigured entries
- Maintain Clean DNS Records: Update or remove DNS records associated with retired servers, domains, or services to prevent vulnerabilities
- Manage DNS Time-to-Live (TTL): Set a shorter TTL to minimize the impact of dangling DNS records, reducing the window of opportunity for attackers
- Implement DNS Monitoring: Deploy a reliable DNS monitoring system to detect unauthorized changes or suspicious activity related to your DNS
- Raise Awareness: Educate your team and stakeholders about the importance of good DNS hygiene and encourage reporting of any unusual DNS activities
Conclusion
If you want a runnable check for dangling CNAMEs on your own subdomains, open the Find Subdomain Takeovers in the Library.
Protecting your DNS infrastructure is an ongoing effort, not a sprint. Stay informed, stay vigilant, and sign up on Trickest and keep those dangling DNS records at bay. Your website(s) deserves the utmost protection.
Key concepts